You make a game but no one really understands wut the hecc is the gameplay of your game except you? Instruction Note. You forgot how to play but too lazy to turn off the full screen and read the description game? Instruction Note. Now you know instruction would make your game a bit better for your game but don’t know how to do it? Absolutely already here, Instruction Note! This Instruction Note example didn’t need any animation so don’t worry about animation much and this tutorial will be based on example pics very much so be careful. Also, this is the instruction note topic, so just being blind to this:
Step 1: Create & Draw Appearance for it
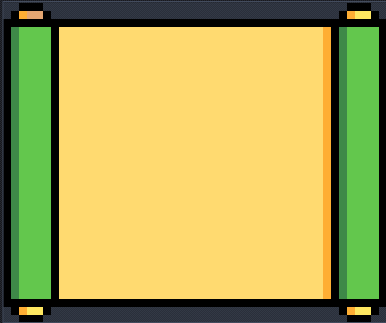
You can design it in any way you want, as long as it is not too messy that everyone who plays your game can still read the text of your instruction note, or just as simple as mine. This is my example:
Step 2: Code to Activate It
So, you gotta need a button on the keyboard to activate it, like “I”, “P” or something like that. Tip: Use those buttons that everyone didn’t use too recently, such as [ ’ ] or [ \ ]. And now, let’s view the code:
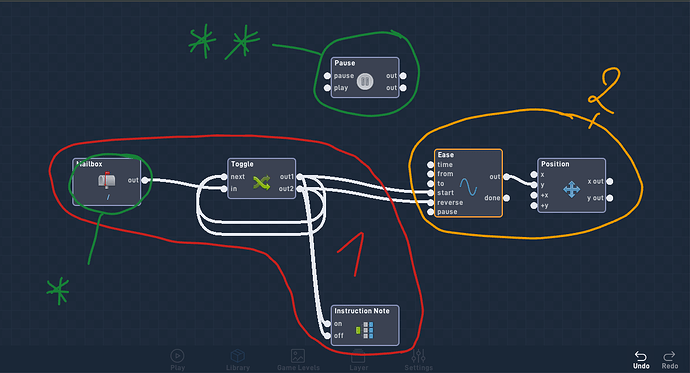
1.Main Code: This code shouldn’t change too much or it will get damaged a whole code.
2.Juicy Part: This makes the instruction a bit more juicy.
*You can replace it with keyboard behavior.
**You can add it if you don’t want the instruction note being paused.
More details:
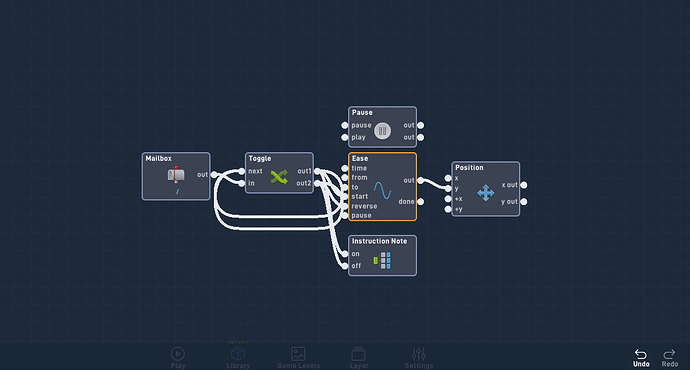
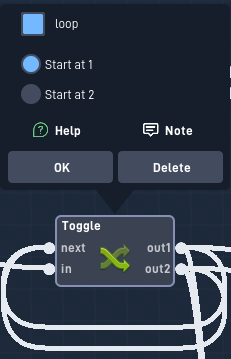
Toggle:
Ease:
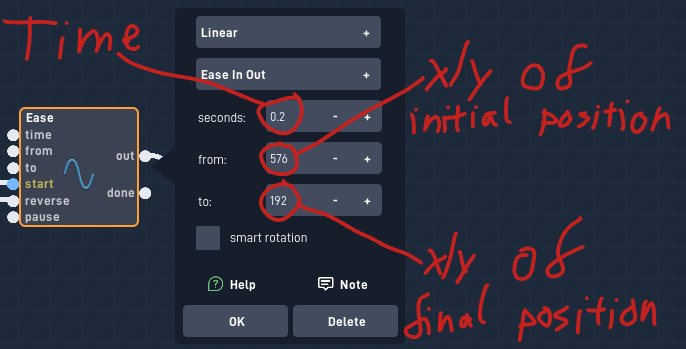
Step 2.1: Setup System
And now, this bundle is a really important system, it has a bunch of code with bundles and we’re really near the hardest part of this tutorial is to let the Instruction Note actually work so pay attention:

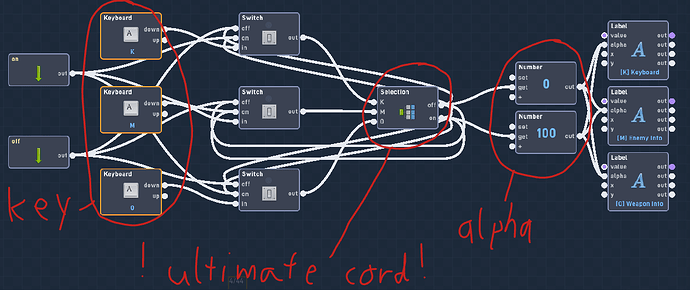
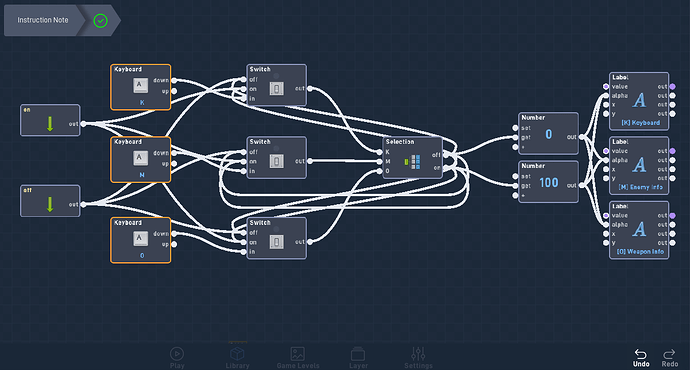
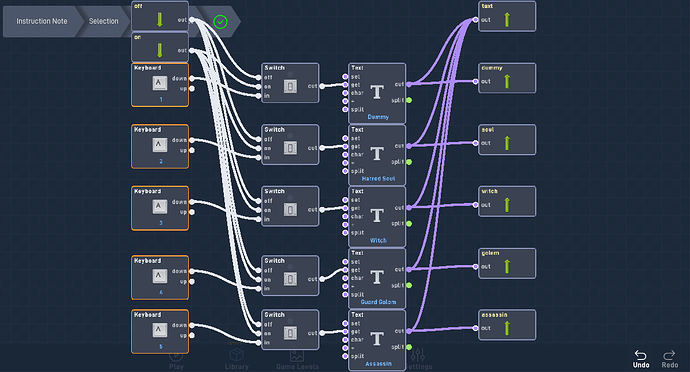
So here’s the first part:
Key: wire ‘down’ to ‘in’ input of the Switch, repeat it until all the keys are wired to its switch. Ex: K to the first Switch, M to second Switch. Also, don’t forget to wire the output to the bundle to VERY specific input.
Alpha: It’s important to make the instruction note’s texts/labels that keep it from being not too messy.
Step 3: Ultimate Cord
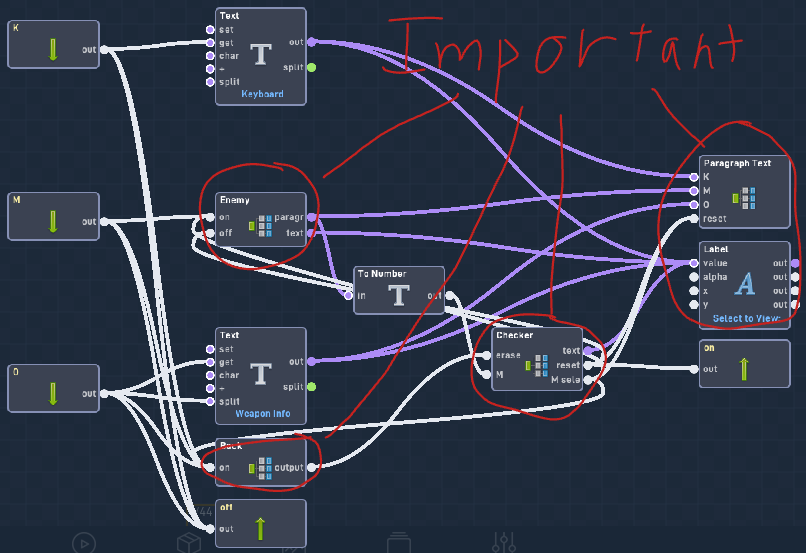
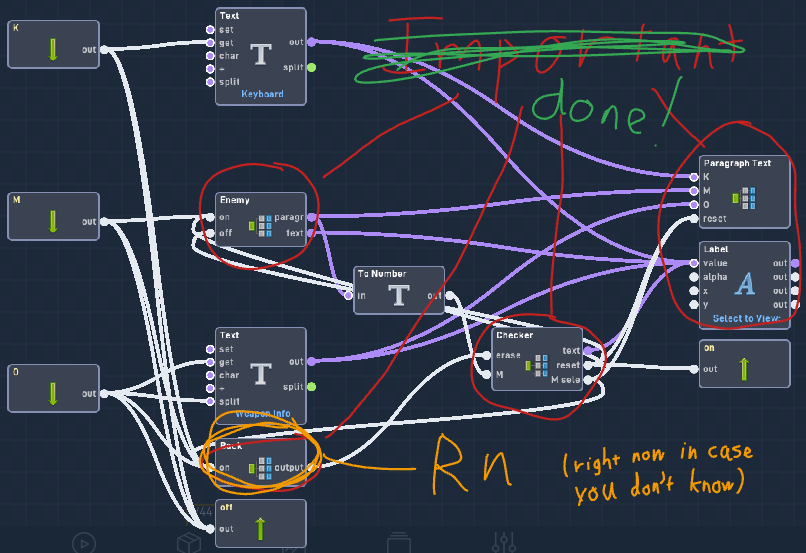
Now it begins to get harder. Here’s the base of this ULTIMATE bundle:
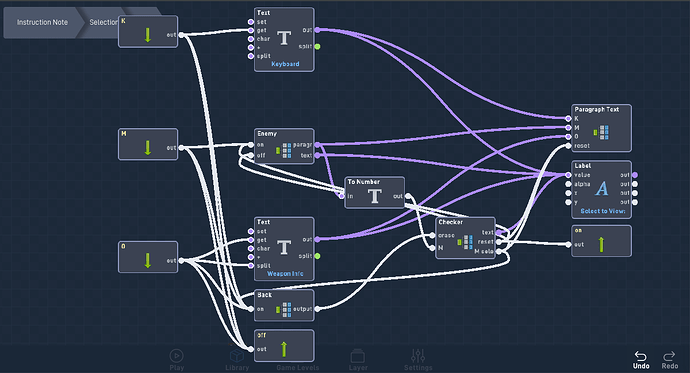
Input of the Bundle: It represents for each key you click to show information and replace the Label. Ex: K will activate the top Text, then activate paragraph Text (which we will do later) and Label. For now, the Text behavior of the ‘K’ key will replace the text of the Label at the right side of the pic from “Select to View” to “Keyboard” (I know, this ex is very long).
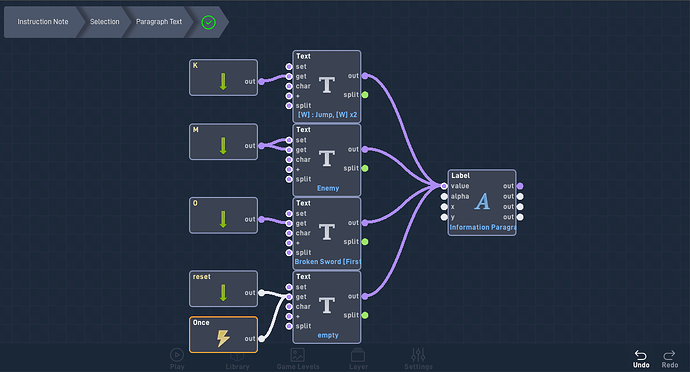
Step 4: Paragraph Text
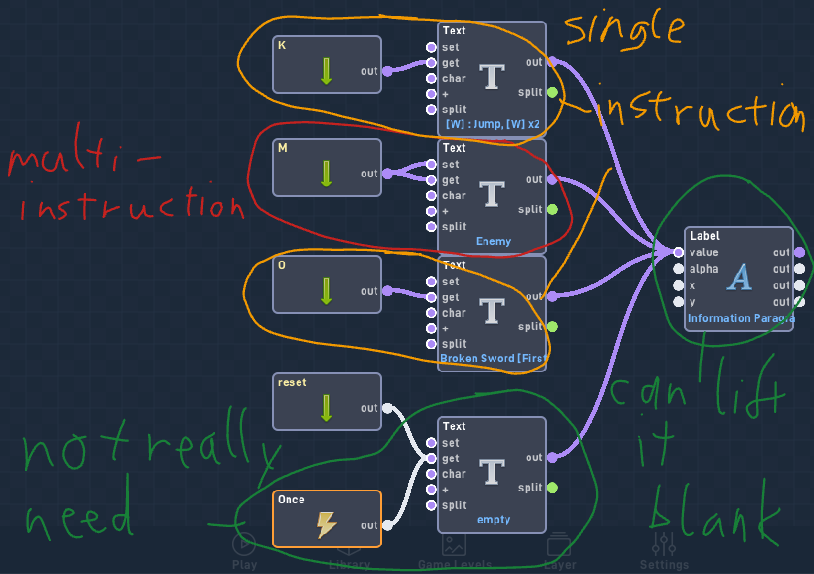
But some of the instructions just need only one page while the others would cost more than 1 page to show all the instruction, so we will classify it like this for easier to understand:
Multi- Instruction: A bunch of different paragraphs to set and send to the Label.
Single Instruction: Only 1 paragraph to set and sent to the Label.
Step 4.1: Multi/Single Instruction
Single Instruction: you just need only 1 Text behavior to set and send it to the Label.
But multi one would be the hardest part so here we go.
This bundle is my example:

Here’s the inside of it:
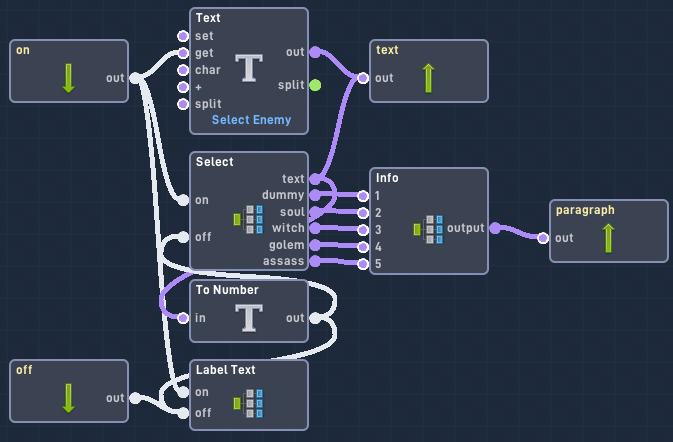
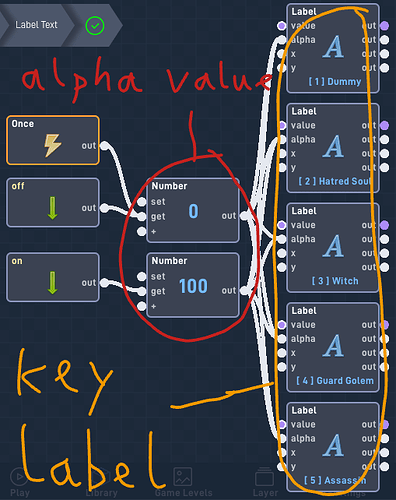
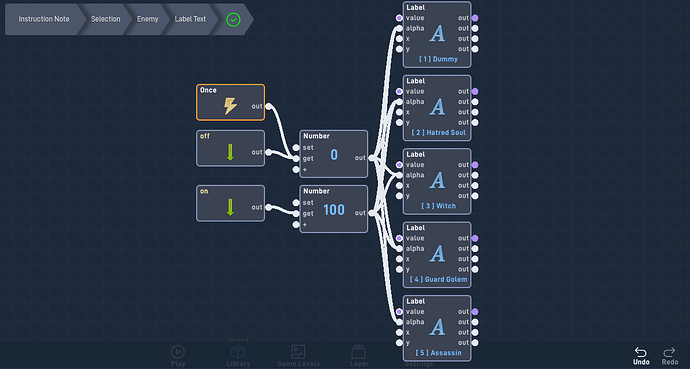
At this time, we’re gonna do the Label Text bundle first to define the key first so we can make sure we already have some keys for code in the Select bundle.
Inside the Label Text bundle:
Alpha value: Like I said, it’s very important.
Key Label: You can use key numbers like mine but make sure it’s not duplicated with others because otherwise it can be a bit messy when you fix or change to fit with your game.
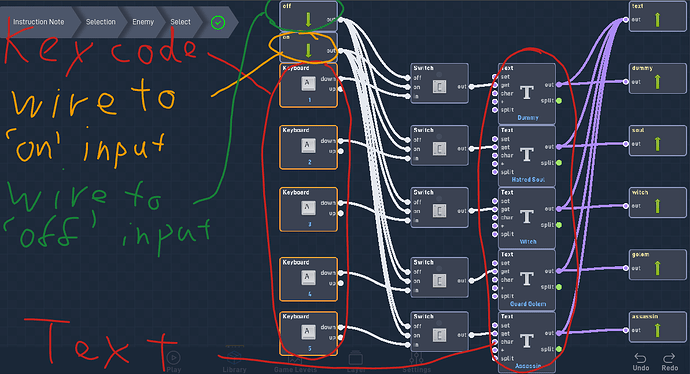
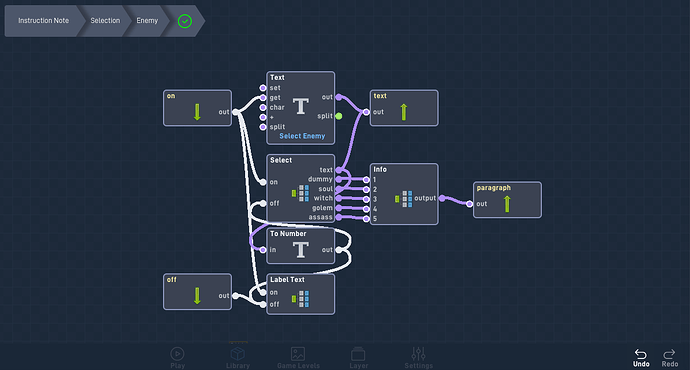
Ok, Select bundle:
Everything for the Select bundle is in the pic but I will summarize it for you to easily understand it.
Key code: Use the key that you choose at the Label Text part and wire it to Switch behavior.
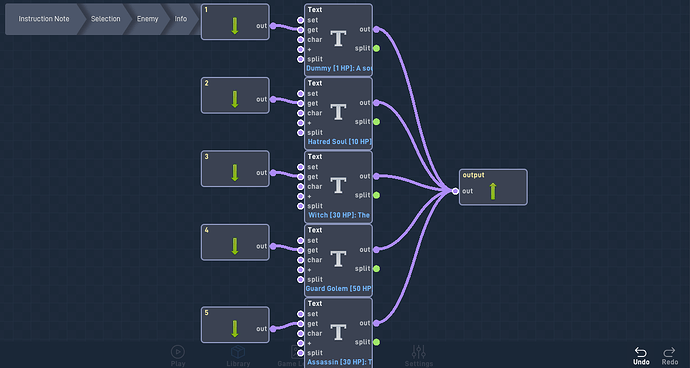
Text: All of that part should be wired to the text output then wire them to their specific output, except the ‘text’ output, the other outputs shouldn’t have 2 or more than 1 behaviors wired to that output.
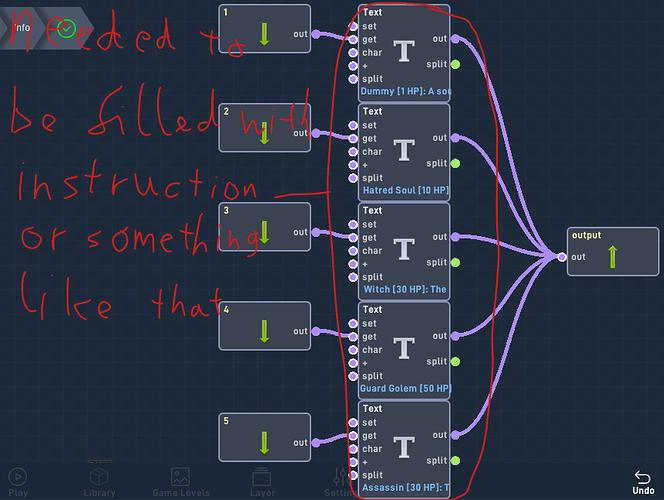
Almost finished the hardest part, now is the Info bundle:
Step 5: Back System
Congratulations, you’ve finished the hardest part, it gets easier now, so let’s move on to the Back System.
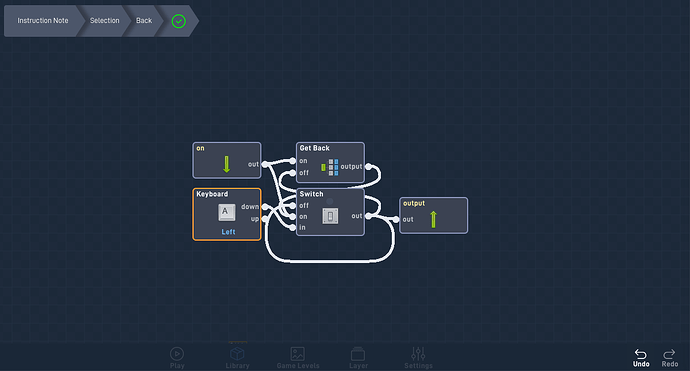
Btw, what is Back System? Technically, it’s just like the left arrow button on the top left corner of the website page, when you click it, it will get back to the previous page that you’ve been. So now, let’s set up a code to use it first.
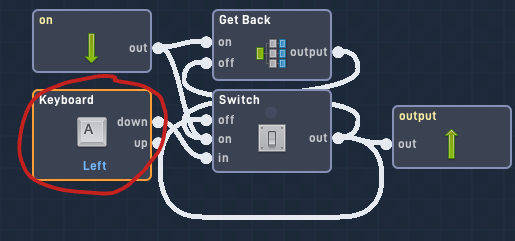
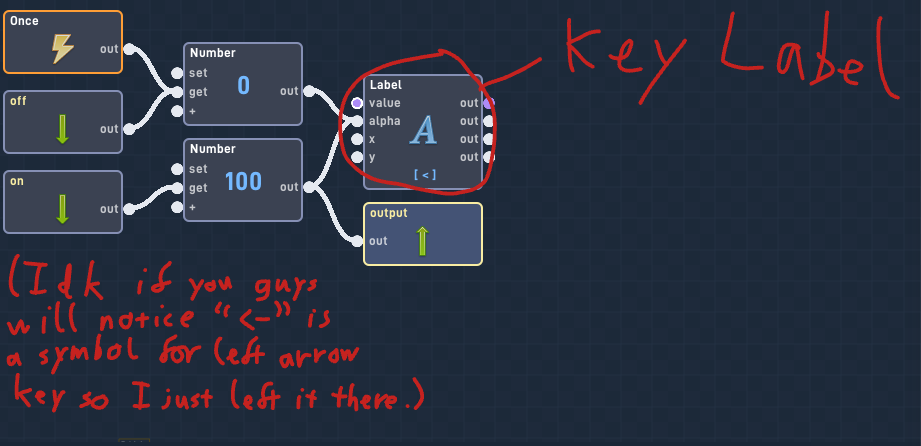
(**The red circle is for the key that will get back to the previous page)
Key Label: Just put the key that represents the key you use to get back to the previous page.
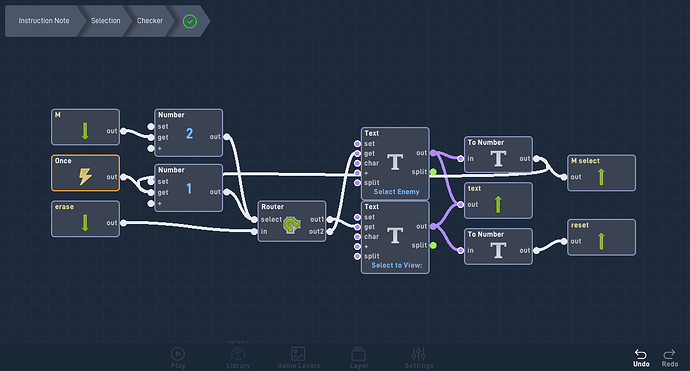
Last one, ‘Checker’ bundle to make sure the code will run perfectly:
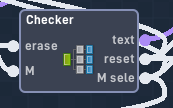
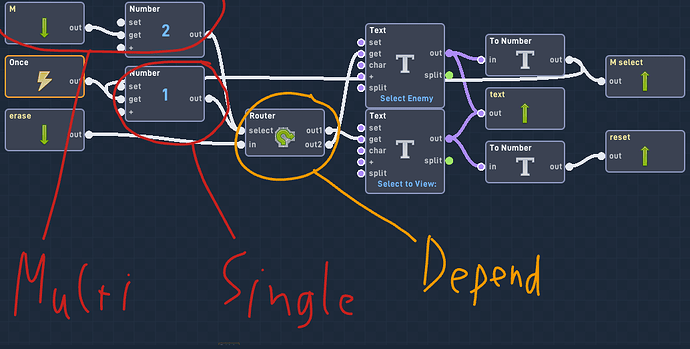
This bundle will check if it’s multi or single instruction one:
Single: It will get back one page only, which sends the signal to the Router to do it.
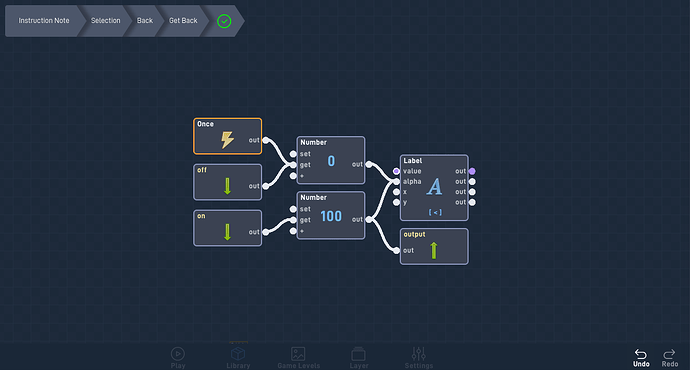
Multi: Change the number to switch back to the previous page, the value will come back from high number to smaller number, then it will come back to 1 then you can come back to the first page.
Depend: Depend on how many pages it needs to get back, the more output of the Router needed.
Step 6: Connect all of them together
Last step for this tutorial, wire all of them together. Sorry for pic if they look to messy that you don’t really know where to wire but I can’t describe very single because it looks like wire that to here, wire that to there, wire those to Pesi, so nope. After you finish the wire behaviors, it should look like this:
Main Code:
Instruction Note bundle:
Selection bundle:
Enemy bundle:
Label Text:
Select bundle:
Info bundle:
Paragraph Text bundle:
Back bundle:
Get back bundle:
Checker bundle:
That’s all for this tutorial. Thanks for spending time reading this post. Have a good night.
